Hacking on small computers
Today’s suggested topic for the Advent of Writing challenge was “A tech or concept you’ve postponed learning”. Quite perfectly, I’ve been part of a small reading group with a bunch of colleagues focused on understanding computer performance. We decided to ditch the book and instead get practical. We all ordered Milk-V Duo 256M (or equivalent) boards and decided to build up the fundamental blocks of neural networks on this device.
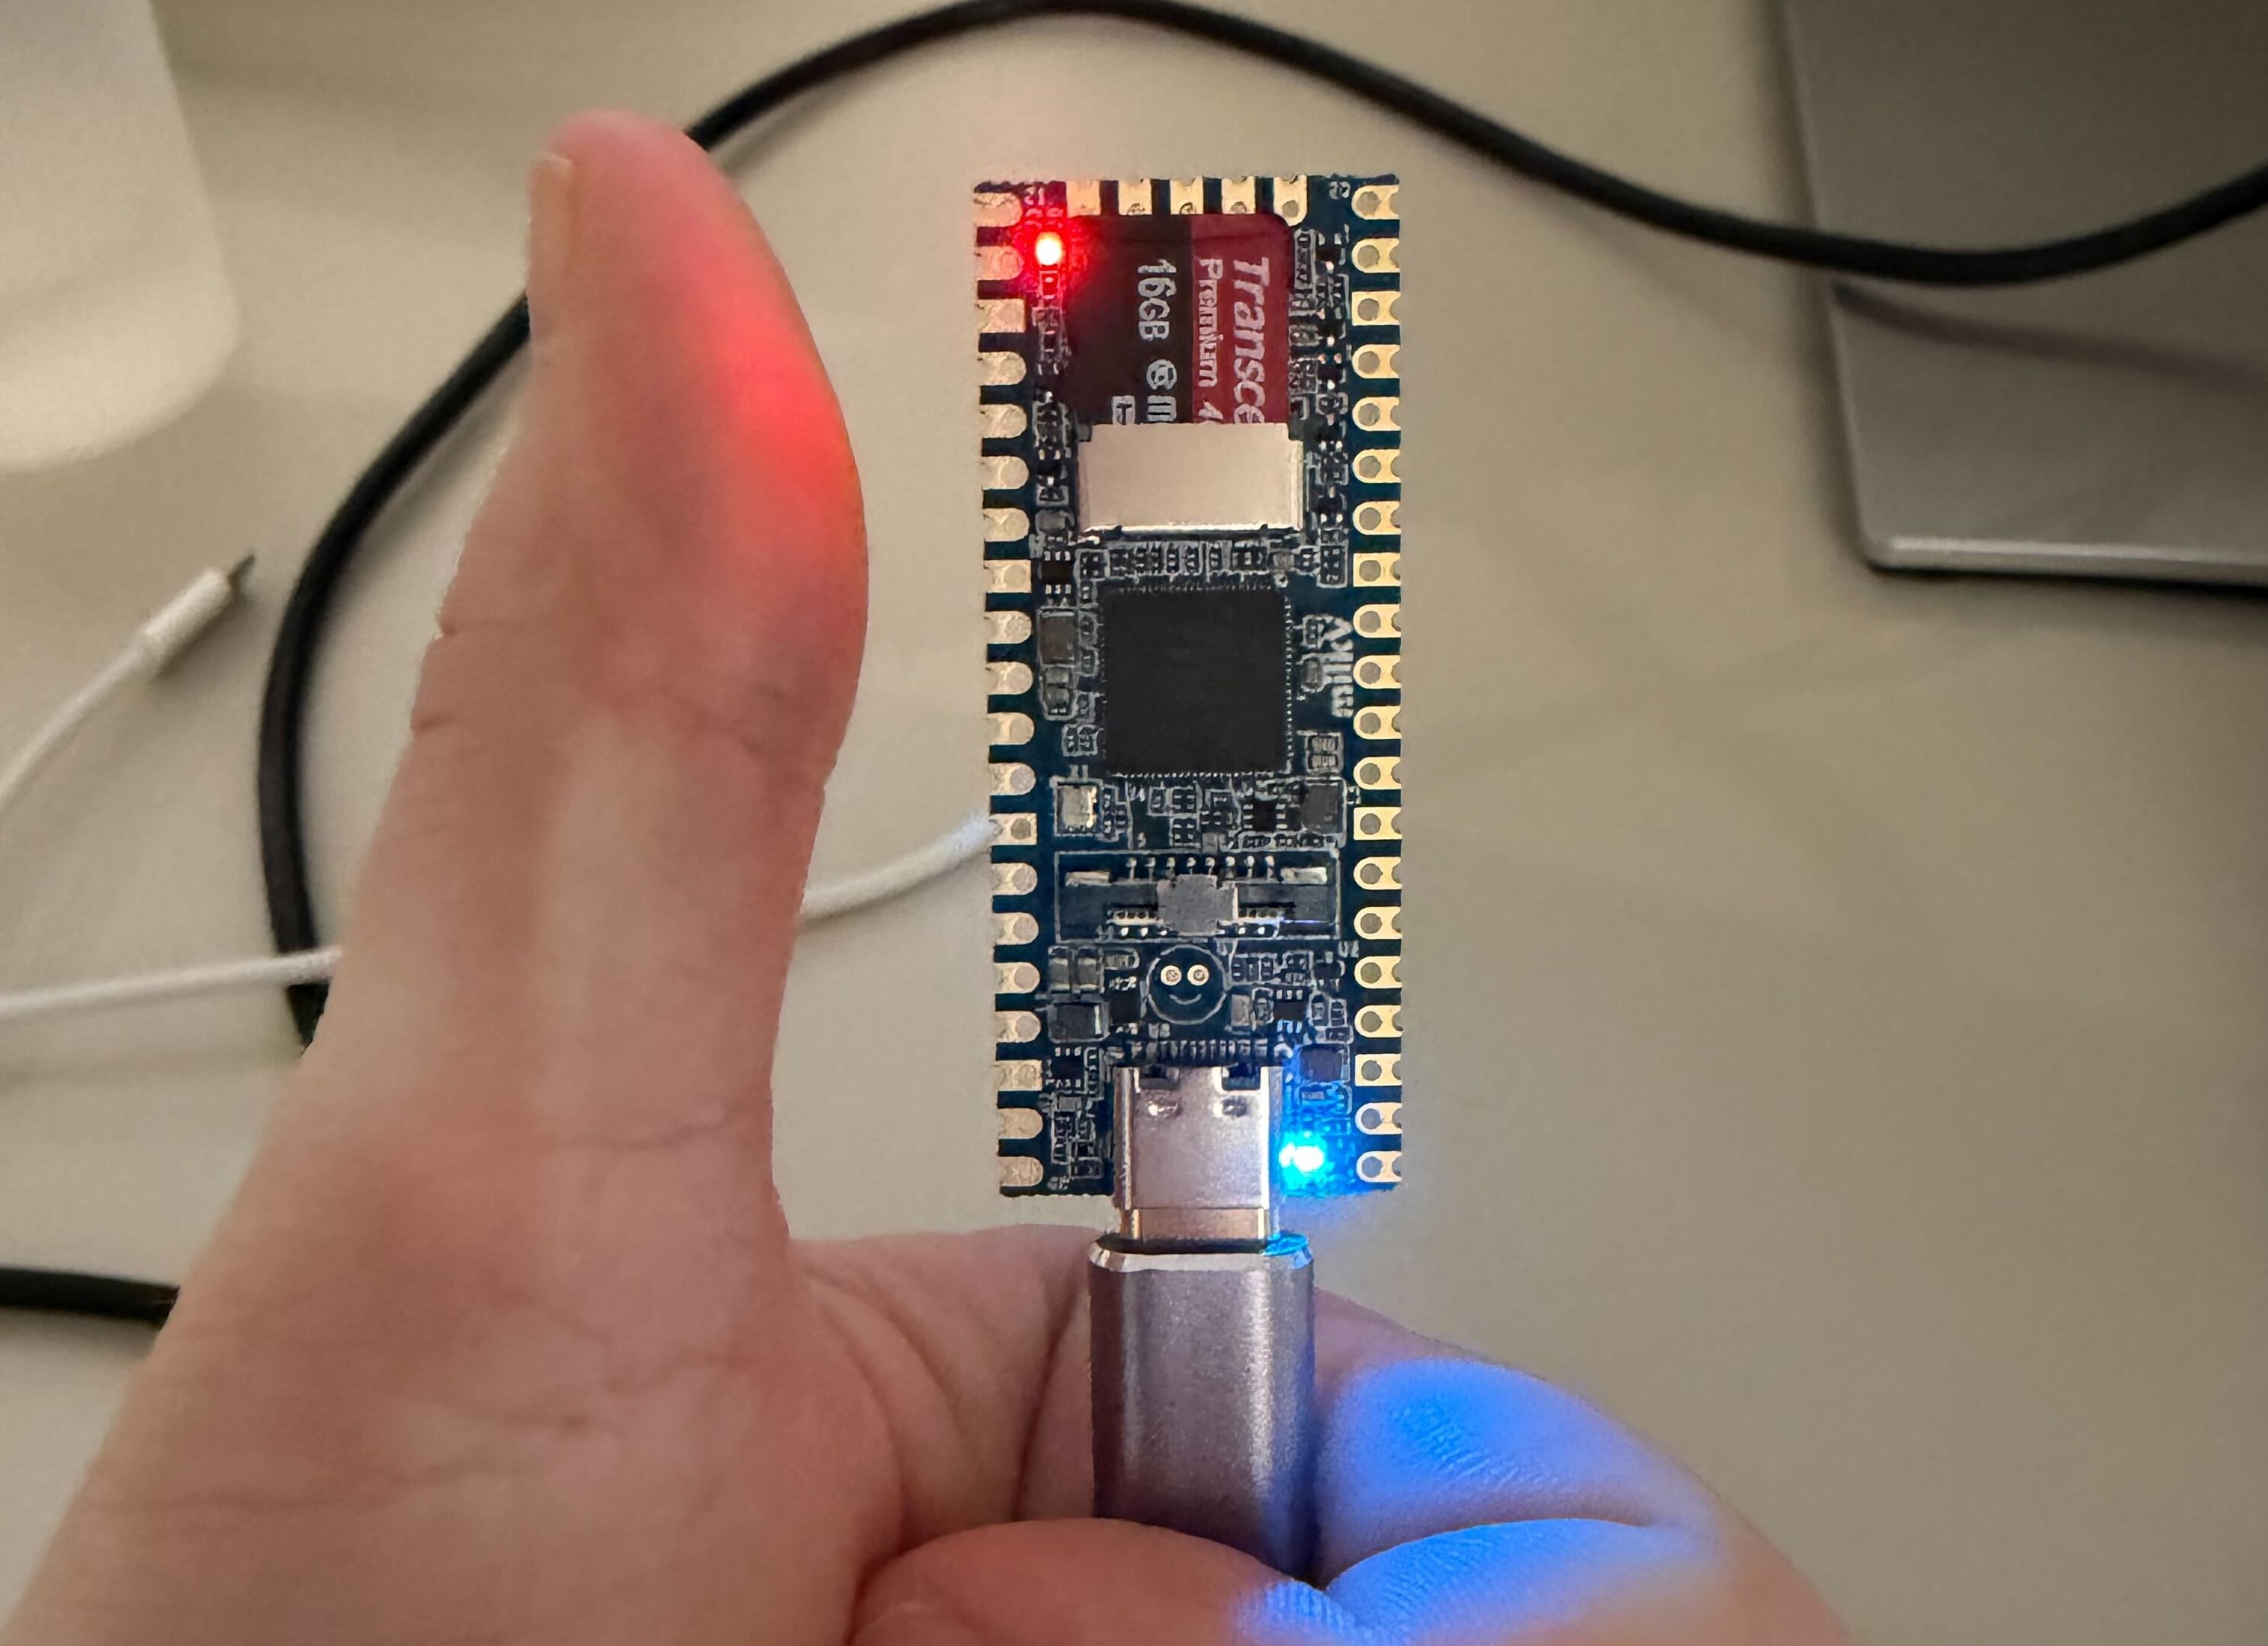
As it happens, mine arrived in the mail today. So let’s boot it up together. Here’s a small picture of it. It’s literally the size of my thumb.
The Milk-V Duo 256M board is a small, Linux-capable SoC board. So it’s not a microcontroller. This thing actually runs Linux; you can ssh into it and so on. It also has a 1 TOPS-class neural processing unit! 👀
So, the setup. It was a bit gnarlier than I’d wanted, but in the end, pretty smooth.
First, we need to flash a micro-SD with the OS. Grab a release from here: https://github.com/milkv-duo/duo-buildroot-sdk-v2/releases/. I used the milkv-duo256m-musl-riscv64-sd_v2.0.1.img.zip. Unzip it, and let’s move on.
You can also choose to use arm64 with glibc, but in my case we’re learning risc-v in our reading group, so that’s the motivation for my choice.
Note that this setup is specific to a Mac since that’s what I’m using. Connect the SD card to your laptop and find it with:
diskutil listThis will give something like:
/dev/disk8 (external, physical)
#:
Which is the SD card. Then unmount it:
diskutil unmountDisk /dev/disk8and run:
sudo dd if=milkv-duo256m-musl-riscv64-sd_v2.0.1.img of=/dev/rdisk8 bs=4m status=progressand eject the card:
diskutil eject /dev/disk8I made the mistake of not properly ejecting this, and it led to some really hard-to-debug situations 😅
You can also reinsert the card and run diskutil list again, which should show you something with FDisk_partition_scheme etc.
Cool, now put the SD card into the Milk-V and plug it into your computer. Again, a pro tip: make sure your USB-C cable supports data transfer and isn’t just a power cable. Luckily, I keep a box at home where I’ve stored every cable since my teenage years, so I naturally had one.
After this, you should see a blue light popping up and blinking. If you only see a red light, Linux isn’t booting correctly, and you need to go back to the previous step to figure out what you did wrong.
The device should be now accessible just through ssh:
ssh root@192.168.42.1The password is always by default milkv.
If you’re successful, you should now see this in your terminal:
[root@milkv-duo]~#Congratulations 🎉
Next, let’s run something on it. Since it’s a small device, it’s advised to do all the development on your main machine, cross-compile, and just move the final binary to the Milk-V. Thankfully, the Milk-V Duo crew have made it quite easy to do this. Let’s do a quick example!
Edit: Later on I learned that Zig ships with a risc-v toolchain, so you can just do
zig build -Dtarget=riscv64-linux-musland it’ll work on the Milk-V.
I cloned the https://github.com/milkv-duo/duo-examples repo and used it to get running. Note that these are for x86 Linux, so if you use a Mac like me, you’ll need to set up your environment in Docker. No problem. CD into the duo-example and run something like:
docker run --platform linux/amd64 -it -v /Users/youname/…/testing/duo-examples:/work ubuntu:22.04 /bin/bashThis will create a running docker container and let you mount the examples directory into it, neat.
From there, you’ll need to run apt-get update and apt-get install -y wget git make to have the basics in the docker container.
Now there’s a nice setup script for you so you don’t need to understand the nuances of the toolchain. The readme is also really good here. But in short run:
source envsetup.shAnd choose 2 and 2 when prompted. Now you should have the correct toolchain installed to be able to cross compile programs for the Milk-V Duo!
Let’s do the hello world! Run cd hello-world and run make. This compiles the helloworld executable for you, and you can copy it to the Milk-V by running scp helloworld root@192.168.42.1:/root/.
Go back, or ssh again, to your Milk-V, and now you should be able to find the program and run it ./helloworld
Which gives you:
[root@milkv-duo]~# ./helloworld
Hello, World!
[root@milkv-duo]~#
And that’s it 😄👍
But let’s do something extra. After all, we want to do some neural network stuff on this machine, so why not do a small dot product? In the root of the duo-examples dir I’ve made a directory called dotprod and wrote this small program:
#include <stdio.h>
#include <stddef.h>

static int dot_product(const int *lhs, const int *rhs, size_t len) {
    int sum = 0;
    for (size_t i = 0; i < len; ++i) {
        sum += lhs[i] * rhs[i];
    }
    return sum;
}

int main(void) {
    const int vector_a[] = {1, 3, -2, 4, 5};
    const int vector_b[] = {4, -1, 0, 7, 2};
    const size_t length = sizeof(vector_a) / sizeof(vector_a[0]);

    if (length != sizeof(vector_b) / sizeof(vector_b[0])) {
        fprintf(stderr, "Vector length mismatch\n");
        return 1;
    }

    int result = dot_product(vector_a, vector_b, length);

    printf("Dot product: %d\n", result);
    return 0;
}
And the accompanying Makefile:
TARGET=dotprod

ifeq (,$(TOOLCHAIN_PREFIX))
$(error TOOLCHAIN_PREFIX is not set)
endif

ifeq (,$(CFLAGS))
$(error CFLAGS is not set)
endif

ifeq (,$(LDFLAGS))
$(error LDFLAGS is not set)
endif

CC = $(TOOLCHAIN_PREFIX)gcc

SOURCE = $(wildcard *.c)
OBJS = $(patsubst %.c,%.o,$(SOURCE))

$(TARGET): $(OBJS)
	$(CC) $(CFLAGS) -o $@ $(OBJS) $(LDFLAGS)

%.o: %.c
	$(CC) $(CFLAGS) -o $@ -c $<

.PHONY: clean
clean:
	@rm *.o -rf
	@rm $(OBJS) -rf
	@rm $(TARGET)
But simply cd:ing to the directory, running make, and again copying it to the Milk-V, I can do some simple dot products on the device:

Neat! This is it for today. Maybe this is useful for you if want to dive into this stuff as well, maybe not 😄